Detailed Dye Cut Shape and Carving on MOP button circa 1940’s
In my love for antiques, there are sections and subsections. When I discovered the artistry behind vintage sewing buttons, they quickly became a prominent category in my list of “Antiques I Adore.” Discovering the history and techniques used to create the miniature pieces of art was enthralling; learning about the transition from made by hand to that of using modern(for the late 19th century era in which this occurred) machinery to create the buttons provided me with a feeling of both sadness and awed wonder.
I mourned, for the button-maker, their loss of the exclusive use of non-electric hand tools to make the bone and shell buttons which had been the staple of American button industry since it’s inception. But the use of technology allowed for much more than enormous leaps in productivity. Makers of buttons used the new tools (electric motors powering drills, files and other forming machines) to elevate their artistry to a higher level.
Because shell was one of the most widely used button materials at the time, the switch from “made by hand” to “made by hand with machined support” is most easy to see. Before power tools were in use, a button maker made each decorative mark on a button by use of a hand tool, usually a metal file. As can be imagined, the range of embellishments which could be accomplished was fairly limited. Below are a few examples of the type of work a button-maker could produce with such hand-powered tools.
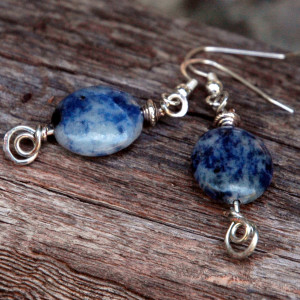
Vintage Mother of Pearl Buttons, Restyled as Earrings. Note the simplicity of etched design, which was created using hand-powered tools.

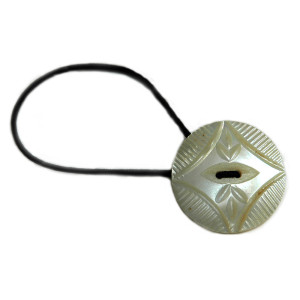
Notice the variation in markings – depth and shape. This work was all done by hand.
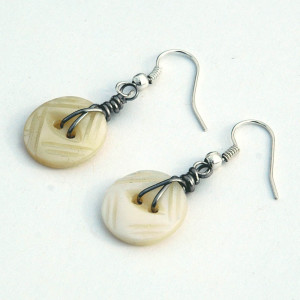
Once machine power came into play, workers could create more embellished pieces in a shorter amount of time than they had previously spent with a more simple design.
Notice the greater amount af cutwork details which were made in this piece. With the use of machine-power, button artisans were able to dedicate more time to embellishment.
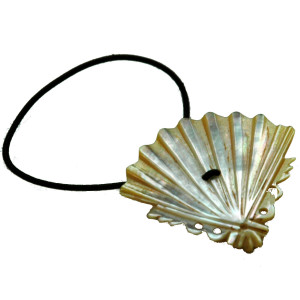
Dye-cut machinery later allowed for decorative shapes to be reproduced quickly, and buttons could take on fanciful shapes. Once the basic design had been cut from the shell, an artisan could use engraving and drilling tools to carve away details, adding more dimension to the designs, as seen in the Asian Fan piece at top and also here:
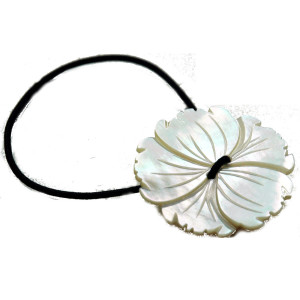
Dye-Cutting machinery allowed for the creation if intricate shaping as shown on the perimeter of this Hibiscus Flower button from the 1940’s
My appreciation for this evolution has made Mother of Pearl and other shell buttons one of those subsections within my Adored Antiques classifications, and I hope that you, too, will come to love the beautiful work button artists from the mid 19th to mid 20th centuries have created. It brings me great pleasure to come across such examples in my never-ending quest for antique buttons. That I have been able to restyle them as ponytail holders, in a way which does not damage the button’s integrity, makes me happy. Buttons which may have stayed cached away in boxes and bins are able to again find purpose – to adorn and pique the interest of admirers – as they were originally intended to do.